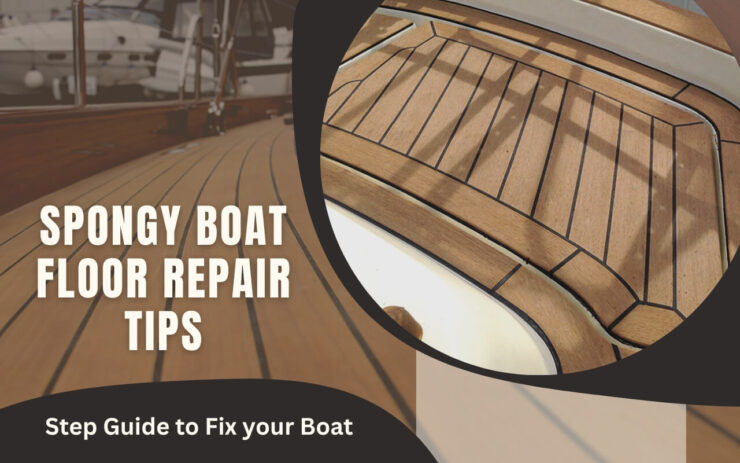
Spongy floors in a boat can seem funny but really weird. But this is a really common scenario for many of boat user. But there are specific repairs you can follow to fix this issue.
So, what are the spongy boat floor repair tips?
To repair your spongy boat floor, you need to change the wood under the fiberglass. So cut the fiberglass and scrape the wood off. Then clean and sand the area. Apply glue on the boat and the attaching board. Finish with putting the fiberglass back on. Let the glue dry before you headout again.
So, that was a quick look at the whole process of the repair. But there are more details to learn about. So, let’s get right into it!
What Causes Spongy Boat Floors?

Boats are not supposed to be spongy. Modern days boats are made with wood and fiber glasses. Fiber glasses are really durable. It’s more like plastic than anything. So it doesn’t rust or rot in the water.
That is why the wood is covered by fiberglass. So, the water doesn’t get in touch with the wood and rot. But if there are any holes which you left open, can cause the wood to rot.
And that is why the wood can inflate and cause the spongy effect. Though it is really easy to fix. Check below, where we have discussed the whole process in 5 steps.
Preparation Process
A spongy boat floor can be a serious problem, as it can cause accidents and damage to the boat. Repairing a spongy boat floor requires proper preparation to ensure a successful repair.
Assess the Damage
Before starting any repair work, it’s important to assess the extent of the damage. Walk around the boat and press down on the floor to identify the soft spots. Also, look for any signs of water damage or rot. If you notice any rot or water damage, it’s important to repair it before starting the spongy boat floor repair. Rot or water damage can spread and compromise the integrity of the boat, causing more damage in the future.
Remove Any Damaged Material

Once you have identified the damaged areas, remove any soft, rotten, or damaged material. Use a saw or chisel to cut away any damaged plywood or fiberglass. It’s important to remove all damaged material, as it can spread and compromise the integrity of the repair work. If the damage is extensive, it may be necessary to remove the entire boat floor and replace it with new material.
Clean the Area
Once you have removed the damaged material, use a vacuum or broom to clean up any debris. Make sure the area is clean and dry before proceeding with the repair work. If the area is not clean, the repair material will not adhere properly, and the repair work may fail.
Sand the Area Use a sanding disc or belt sander to rough up the surface of the remaining floor material. This will create a better surface for the epoxy or other bonding material to adhere to. The rough surface will provide more surface area for the bonding material, which will make the repair stronger and more durable.
Tape off the Area
Use masking tape or painter’s tape to protect the surrounding areas from the repair material. This will prevent any accidental spills or drips from damaging the surrounding areas of the boat. Be sure to cover any nearby hardware, such as cleats or rails, to prevent them from being damaged during the repair process.
How to Fix Spongy Boat Floors?
Before you start working, you need a few things to do this job. You’ll be needing a saw to cut through the fiberglass to the wood. Glue to attach everything back. A new wood panel. And your skillset to do the job.
So, if you have everything around you, let’s get started!
Step 1: Cut the Fiber Glass Off
Firstly, check where the sponge floor is on the boat. You need to cut the spongy area on the boat with the saw. Make sure to set the depth level of the saw to the wooden part of the boat. Otherwise, the saw can cut right through the wood and to the boat.
Although, before you start cutting, make sure to remove any important parts. Such as is the it’s spongy around the steering wheel, remove the steering wheel first. Otherwise, it can get damaged.
Also, before you start cutting, make sure not to damage the fiberglass on top. Most of the time the fiberglass can be reused. The fiberglass doesn’t rot like wood. So, often cases the fiberglass is not affected.
But if water has destroyed all the wood, you can cut right through. But make sure not to cut through the fiberglass which is under the wood. You’ll be needing that piece of fiberglass when you apply the new wood.
Step 2: Remove All the Rotten Wood
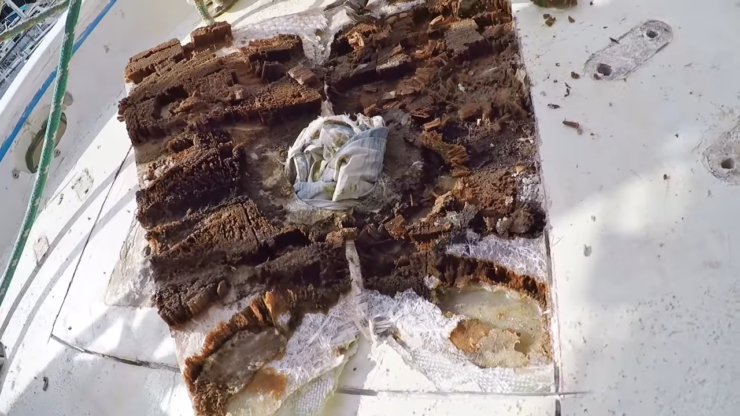
When you remove the fiberglass, you can expose all the rotten wood under it. Using a shovel in this scenario can be really helpful. Use the backside of the shovel and push on the rotten wood.
Often cases not all of the wood is rotten. Check where the water came from. And on the basis of that, you can determine how much wood you need to scrape off.
If the water came from the top, start scraping until you see dry wood coming out. But if the water came from the bottom, you need to change the wood of the whole area.
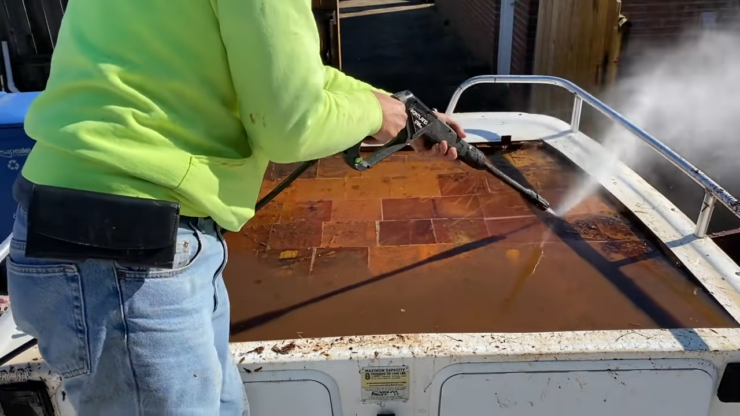
Step 3: Pressure Wash and Sand the Area and the Fiber Glass
After you scrape off all the wood, you have to pressure wash the whole area. The pressure wash will ensure there is no glue or wood sticking around. Make sure to blast water in the corners. Usually, glue sticks in the corners and in the sides.
After you wash the whole area, you also have to sand the shole area. The sanding is necessary because otherwise, the glue will not stick to the wood. Also, the fiberglass has to stick on the wood. So scraping with the sand paper is necessary.
Also, remember to dry the whole area before you apply glue. Water and glue dosen’t attach well. So, it won’t stick that well. The glue will lose some of its effectiveness. You can dry the area with a towel or heat gun. Make sure to dry the corners.
Step 4: Apply Glue on the Both Parts
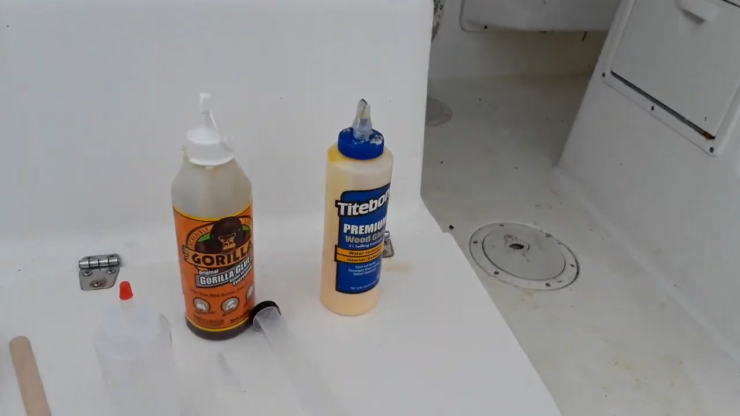
Now that the area is clean, get wooden board which you need to stick back. You need to replace the wood in the rotten area. So, go to the hardware store and bring a wooden board for boats.
The type of wood you choose can also determine th quality. Make sure you are using wood which are meant to use in boats. These woods can stand against water a bit more than other woods.
Not cut the board with the saw according to the size you need. You can get the exact size if you use the measurement of the top fiberglass of the boat.
Now, apply glue on the fiberglass and the wooden board. Make sure to spread the glue on the board with a scraper. This way the coat of the glue will evenly spread.
Let the glue become sticky, and then push the board on the area. Afterwards, push the fiberglass on top.
Step 5: Attach all the Pieces Back Together
Now that all the pieces are in place. You need to push down so it sticks to the boat. Also, you can put some heavy things on the top so it pushes down on the boat.
Make sure you apply glue in the gapes in the corners of the boat. This way the glue will able to fill any of the gaps in between. Cause in future if there are any cut outs, water can sip in. And cause molding and rotting again.
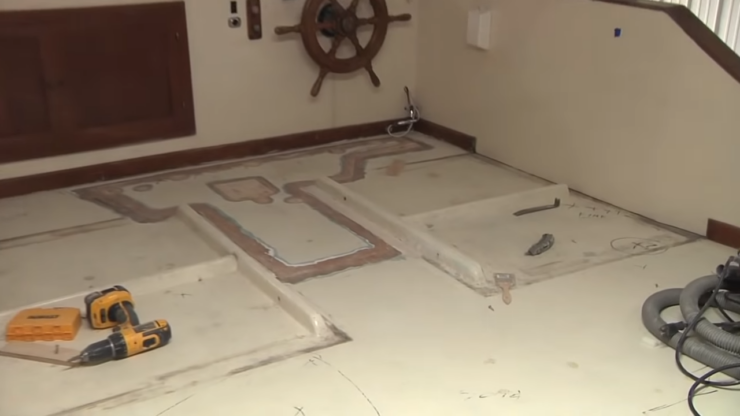
Fixing the floor can be a good solution. But aesthetecally this is not a good solution. Changing the boat floor can be a better option if that is one of your concern.
The glue will take 12 hours to 24 hours to stick. After that you can take the boat for a ride. And that was everything about how you can fix the sopngy floor on your boat.
FAQs
How does Adding Foam to the Boat Help?
Floating foam can increase the sink-proofing, temperature control, adn also soundproofing. You can use foam on your boats on the gaps or in hollow spaces of the boat.
What Glue should I use to Attach Fiber Glass?
Using glues such as fiberglass fusion adhesive is best in this scenario. These glues can stick on any polyester area. Also, the glues doesn’t require that much of a surface preparation.
How Long does it Take the Fiber Glass to Stick Properly?
Usually, the fiberglass glues need minimum 12 hours to 24 hours to stick. Also, the amount of glue matters. The more glue you use the longer it will take to dry. Pressing down on the glued area can speed the process up.
How Can you Fix Fiberglass Delamination?
Fiberglass delamination is a common problem that occurs in boats, cars, and other fiberglass structures. Delamination occurs when the layers of fiberglass separate from each other, which weakens the structure and can lead to further damage. Here are the steps to fix fiberglass delamination:
- Identify the Delamination: The first step is to identify the area of delamination. This can be done by tapping on the fiberglass with a hard object like a screwdriver. Delaminated areas will sound hollow when tapped, while the undamaged areas will produce a solid sound.
- Drill Holes: Once you have identified the area of delamination, drill 1/8-inch holes through the top layer of fiberglass. These holes should be about an inch apart from each other in the delaminated area. This will allow the resin to penetrate the delaminated area.
- Clean the Delaminated Area: Use a scraper or sandpaper to remove any loose or damaged fiberglass. Then, clean the area with acetone or another solvent to remove any wax, oil, or dirt that may be on the surface.
- Inject Resin: Mix the resin according to the manufacturer’s instructions. Then, using a syringe or plastic squeeze bottle, inject the resin into each hole that was drilled in the previous step. Continue to inject the resin until it starts to come out of the next hole. This ensures that the entire area is filled with resin.
- Apply Pressure: Once the resin is injected, place a piece of plastic over the area and cover it with a weight. This weight will help to apply pressure to the area and will keep the fiberglass layers pressed together until the resin cures.
- Sand and Finish: After the resin has cured, remove the weight and plastic covering. Use sandpaper to smooth out any rough areas or excess resin. Then, apply a layer of gel coat to the repaired area to match the rest of the fiberglass. Allow the gel coat to cure before using the structure.
Endnote
So, that was everything you needed to know about spongy boat floor repair tips.
Always wear gloves and eye protective goggles when working with tools. Also, make sure the glue sticks properly before you head out.
Goodluck with your boat!
I’m Liam Jackson, the proud owner and driving force behind KayakPaddling.net. Born somewhere in the expansive beauty of the United States, I’ve nurtured a lifelong passion for kayaking and fishing that has led me to explore the far corners of our nation’s waterways.