Does it seem to you that your Johnson outboard throttle isn’t working as smoothly as before?
You might be hearing shuddering noises that you shouldn’t hear. The issue is surely about the adjustment of the throttle cable.
So how do you do your Johnson outboard throttle cable adjustment?
Once you’re sure that there’s an adjustment issue with your throttle cable, it can be fixed easily. First, you’ll have to pull out the throttle cable from the lever.
You’ll have to pull and tie the throttle cable and cut off the extra bits. You may have to replace the cable if you’re still having issues.
Does this seem alright? Continue to read and you’ll learn about the process of this operation in detail.
What’s there to wait for? Let’s get it started!
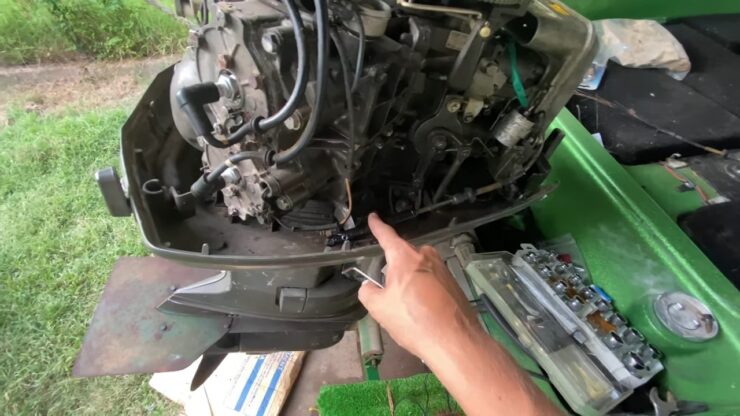
Johnson Outboard Throttle Cable: Framework
It’s crucial to understand the cable’s composition prior to adjusting it. The Johnson outboard throttle cable is a round-corded cable.
It fastens to the metal studs on the exterior of the throttle body. It controls how much fuel is injected into the engine.
And also adjusts how quickly or slowly it accelerates.
Johnson throttle cables have oval metal loops on each end. It attaches to the screws on either side of the choke lever.
The tension adjustment screw is located on top of both loops.
It can be turned with a screwdriver thanks to a Phillips head slot. The speed control setting may be adjusted by turning it either clockwise or counterclockwise.
There are markings along this adjustment screw for reference points. 2 for slow, 4 for normal, and 6 for fast.
How to Tell If Your Cable Needs Adjusting
Maybe your engine is sputtering or the drivetrain is causing a rough, shuddering noise when accelerating.
There are several factors that make it simpler to understand what’s happening if you’re puzzled.
Look out for these symptoms-
It might be very difficult to move the throttle from spot to spot. You’ll see that it stays in one place, even when you’re trying to move it. The throttle might even stick at a point other than idle speed.
You turn the key and it moves a few millimeters before returning to the idle position.
This is a sign that your throttle cable is loose or worn out.
Let’s suppose that you’ve managed to adjust your Johnson outboard throttle cable. But upon starting your boat, you noticed that it was running much slower than expected. And it has little power.
Here’s how you can know if you have adjustment issues with your Johnson outboard throttle cable-
Disassemble
First, pull the outboard throttle lever completely to its furthest-open position and then stop there.
Visual Inspection
Visually inspect your outboard throttle cable to see if it has any visible wear to it. Such as frayed or split stainless steel wire edges, and water-damaged rubber weather-seal.
Or see if it has aluminum tape stuck to the copper wire insulation, etc.
If you find any of these conditions on your Johnson outboard throttle cable, then that’s it! You have an adjustment problem with your Johnson outboard throttle’s wire.
You’ll need to get it fixed as quickly as you can. Fortunately, we’ll explain how to get through it for you.
7 Steps to Adjust Johnson Outboard Throttle Cable
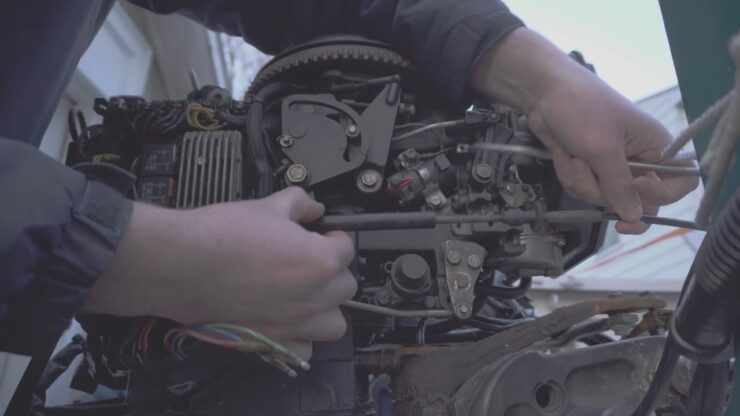
If you’re sure that you have an adjustment issue with your throttle cable, here’s the quick fix. We’ve prepared 7 easy steps to get done with this problem in no time.
1. Pull the throttle control cable away from the outboard’s throttle lever. Do this by grasping it in your right hand.
2. With your left hand, pull up and back on the throttle lever. You have to do this until it is fully backed off. Then let go of the cable.
3. Now you need your right hand, which is still grasping the throttle control cable. Bring it to a point midway between your current position and where you want it located.
4. Release the tension on the control wire rope. At this point, hold onto this point tightly with your fingers for support. Do this to allow room for a knot to be tied to one end of it.
5. Put a basic overhand knot not far from the throttle control cable’s end.
6. Using your left hand, slowly and steadily pull the knot toward the throttle control lever. Then pull it all the way in place. Use cable cutters to remove any extra length.
7. By attempting to move the throttle lever back and forth, you may evaluate your progress. Use your right hand to do this while using your left to secure it.
To check if it’s all right, allow it to return all the way. You should get a positive “click” when returning it to its resting position. If there is still some play in your throttle cable, then repeat steps 1-7.
Johnson Outboard Throttle Cable Replacement
If you’re still having problems with the adjustment, there’s no way left but to replace it. Here’s how to accomplish it quickly and easily.
Disassembling
Remove the throttle cable clip from the throttle lever with the remover tool. Then remove the anchor screw and washer for the throttle cable.
Take out the cable retainer and remove the throttle cable from the lower engine cover grommet.
Loosen the throttle friction control so that the grip is unrestricted. Do not back out the screw completely. The nut is held in place by spring tension.
Remove the seven screws and the tiller handle’s bottom cover. Also, remove the screws that hold the stop switch lid in place.
Disconnect the electrical connector for the stop switch. Take out the stop switch and unplug the trim switch connection.
To release the grip detents, use Twist-Grip Remover. Tighten the screw and lift the grip to remove it. The helix halves, rollers, and guides should be taken out along with the throttle pin.
Reassembling
Install the throttle cable’s handle end. Insert the throttle cable trunnion into the handle’s recess. New retainer clips should be used in its place.
Completely insert the throttle cable pin into the end of the cable.
The end of the pin, guides, rollers, helix halves, and inner steering handle should be lubricated.
Place the guides on top of the roller pin and into the inner handle’s holes. Place the rollers on the roller pin’s ends.
Put the helix halves together on the handle. Also, double-check that the wire guide in the inner steering handle is in place.
While installing the twist grip, carefully draw the trim switch wires through the inner tiller handle.
Place the tie strap in place. Connect the connection for the stop switch. Secure the bottom cover of the tiller handle.
Safety Tips
Safety precautions are always necessary to protect you and others around you.
Here are some safety recommendations to make sure your diligent effort pays off-
Pre-Operation Do’s
Twist and remove all spark plugs in the beginning. This step is to avoid starting the engine accidentally during maintenance.
Use Genuine Parts
Use Johnson Genuine Components or parts that have similar properties for replacing parts. Type, strength, and material are all factors to consider. Using inferior parts might lead to damage or product failure.
Tightening Precaution
Tightening torque wrench instructions must be followed to the letter.
If the locking function of any locking fastener (locknut or patch screw) becomes weak, replace it.
When reusing a locking fastener, there must be a distinct resistance to turning.
FAQs

1. How do you tighten the throttle cord on an outboard motor?
Place your screwdriver inside and give it a couple of spins. This will tighten the wires, preventing the throttle from slipping back.
2. What exactly is throttle friction adjustment, and how does it function?
It’s simply the throttle friction with the adjustment screw on the tiller, which is usually below the throttle.
Friction increases as you go clockwise and reduces as you go counterclockwise.
3. What’s the deal with Throttle drop?
It’s when you have to press the accelerator past the point where you want it to go. It’s so that it might revert to its starting place.
4. How do you adjust the idle on a Johnson outboard motor?
To adjust the idle on a Johnson outboard motor, follow these general steps:
1. Start the engine and let it warm up for a few minutes.
2. Locate the idle adjustment screw on the carburetor. It is usually a small screw located near the throttle linkage.
3. Turn the idle adjustment screw clockwise to increase the idle speed or counterclockwise to decrease the idle speed.
The idle speed should be set to the manufacturer’s specifications, which can be found in the owner’s manual or online.
4. Make small adjustments to the idle speed and test the engine’s response by shifting in and out of gear. The engine should shift smoothly without stalling or bogging down.
5. Once the idle speed is set correctly, turn off the engine and tighten the idle adjustment screw to lock it in place.
It’s important to note that different models and years of Johnson outboard motors may have slightly different adjustment procedures, so be sure to consult the owner’s manual for specific instructions for your motor.
Additionally, it’s always a good idea to perform routine maintenance and inspections on your outboard motor to ensure it is operating safely and efficiently.
5. Why does my outboard shake at idle?
There are several reasons why an outboard motor may shake or vibrate at idle, including:
Fuel system issues: If the fuel system is not delivering the proper amount of fuel to the engine, it can cause the engine to run roughly at idle.
A clogged fuel filter or dirty fuel injectors can restrict fuel flow and cause engine misfires or rough idle.
Ignition problems: If the spark plugs are worn or dirty, or the ignition timing is off, it can cause misfires and rough running at idle.
Engine mounting or alignment issues: If the outboard motor is not properly mounted or aligned, it can cause vibration and shaking at idle. This can occur if the motor is loose or if the motor mounts are worn.
Propeller damage: If the propeller is damaged or out of balance, it can cause vibration and shaking at idle.
Mechanical issues: Internal engine problems, such as a damaged or worn-out cylinder, can cause rough idle.
If you are experiencing shaking or vibration at idle, it’s important to diagnose the problem and make any necessary repairs to ensure the engine runs smoothly and efficiently.
A qualified mechanic or outboard motor technician can help diagnose the issue and recommend the best course of action.
Winding Up
We can hope that now you know how to do johnson outboard throttle cable adjustment. Always remember to adhere to the safety protocols. Or you can fall others at risk.
I’m Liam Jackson, the proud owner and driving force behind KayakPaddling.net. Born somewhere in the expansive beauty of the United States, I’ve nurtured a lifelong passion for kayaking and fishing that has led me to explore the far corners of our nation’s waterways.