
An outboard stator is an important component of an outboard motor, which is used to power boats and other watercraft. The stator is a stationary component of the motor, consisting of a set of wire coils that generate electrical energy when they are exposed to a magnetic field created by the motor’s rotor.
In an outboard motor, the stator generates electrical energy that is used to power the motor’s ignition system, charging system, and other electrical components. The stator is typically located near the flywheel and is connected to the boat’s battery and electrical system through wiring.
A malfunctioning stator can cause various problems with an outboard motor, such as difficulty starting, poor performance, and electrical system issues. In some cases, a faulty stator may need to be replaced or repaired by a professional mechanic to restore the motor’s performance and reliability.
Engines are complicated to understand. There are a lot of parts, and a stator is a small but really important part. Before you change the stator itself, it’s better to test it out. Some minor issues can be fixable.
But, how to test outboard stator?
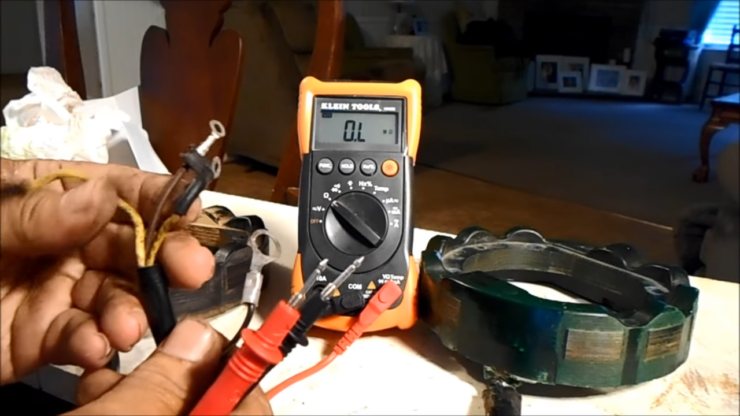
Testing the stator in the engine is really easy. All you need to do the testing is a multimeter. Locate the wires which connect the stator. Connect the two multimeters with the coils of the connecting wire. Subtract the neutral reading for the correct reading. This is the static test method.
So that was a quick look at the whole process. But there are more details for you to understand. Below we have given the full details described in easy steps. So, let’s jump right in!
How Can You Do a Static Test of the Outboard Stator?
Now, this is more of a simple test. Also, the reading you will be getting can be a bit off. Since this test isn’t that accurate, we say don’t come to a decision on the basis of this.
But just to know if your stator is okay or not, this can be a good test. You also don’t need to turn your motor on. Also, all you need to do for this test is a multimeter. Don’t worry about using a multimeter. Using it is really easy.
The multimeter has many settings. But you have to use the Ohm setting when doing the test in static mode. The static mode means the engine isn’t running. That is why you need to calculate the resistance. So, let’s begin!
Step 1: Open the Engine Cover
To work on the stator, you need to open the engine up. The stator is a part of the engine. And there are wires which can get in touch with the water. That is why it is covered under the engine cover.
To get access you need to take the full engine cover off.
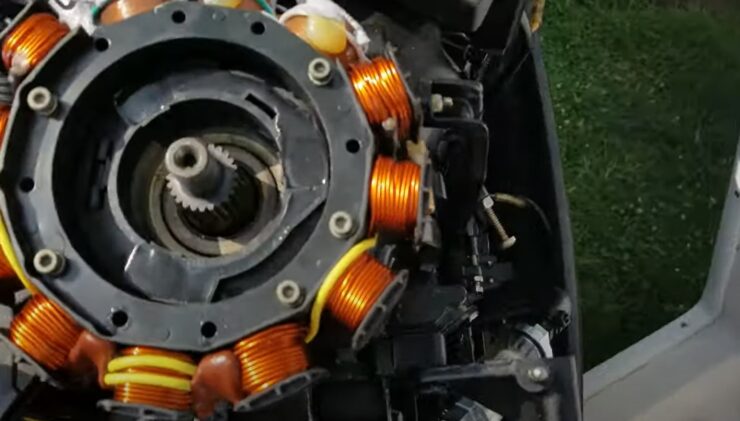
Step 2: Locate the Stator Wires
Now that the engine cover is off, you need to find the stator. The stator is connected with the regulator rectifier. You can see two wires coming out of there. The wires connect to the stator itself.
But we need the wires to check the condition of the stator.
Step 3: Connect the Multimeter Wires
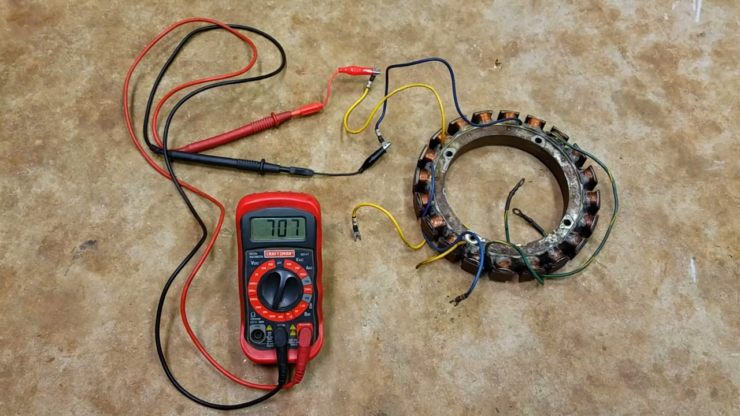
You have to unplug the wires and that will expose three connections or coils. You need to attach the multimeter to check the state of the wires. The connections are also known as Y1, Y2, and Y3.
You need to connect both ends of the multimeter. The connections are actually like Y1 and Y2, Y2 and Y3, and Y3 and Y1. this is how you can get the readings.
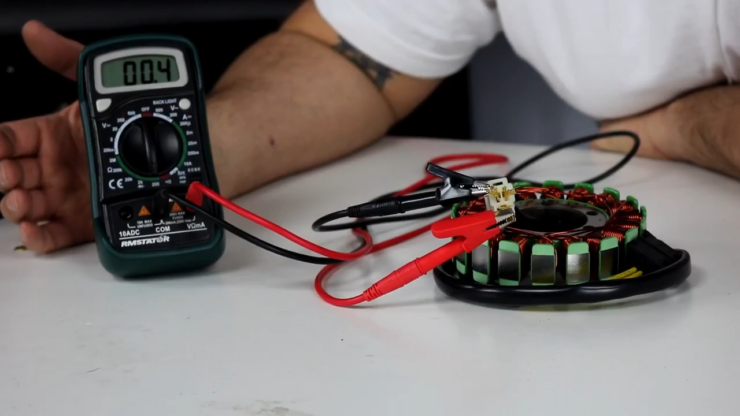
Step 4: Calculate the Reading
To get the right readings you need to subtract the neutral Ohm rating first. So check the Ohm rating on your multimeter. Let’s say the neutral reading is 0.1. Then if the stator reading is 0.5 then subtract 0.1 from 0.5.
The resistance should be is at 0.25 and 0.37. If these are the reading you get from all three connections, then the stator is fine.
If you are wondering, does the motor charge the battery? It does. A stator is important cause it is related to charging the battery of the engine.
And this is how you can test your stator when the engine is off.
Dynamic Stator Test
When the vehicle is turned on, the dynamic stator test is run. Here, the voltage generated by each phase of the stator is typically monitored.
You should check your manual before continuing because different stator types have different suggestions for AC voltage readings.
To run a dynamic rest on your stator, you:
- Set your multimeter dial to AC voltage (VAC) and place the leads into the different stator wire phases. At this point, the engine is switched off and the multimeter should have no reading.
- Switch on your engine and the multimeter should have a positive reading in the 20s.
- Rev up your engine and the reading produced by the multimeter is expected to increase accordingly. If the multimeter does not produce a corresponding increase in voltage reading, then your stator is bad and needs to be changed
This procedure is repeated with the probes interchanged between P1, P2, and P3. If the whole procedures seem tricky, here is a video that shows how to run comprehensive static and dynamic tests and what to expect.
How can You Do the Idle Test of the Outboard Stator?
Now, the reading you get when the engine is off isn’t always accurate. The best reading you can get is when you connect to an idle engine. Now the process is really similar to the static state. You can find some similarities. So, let’s begin!
Step 1: Start the Engine Up
This time around you need to start the engine. So get into the position to start the engine. You need to put the motor in the water to start it. It’s better to do it in your garage with a tub of water instead of doing it in the lake.
Step 2: Disconnect the Stator Wires
Like we said in the static state, disconnect the stator wires once when it starts. After starting you can easily take the wires off. It won’t stop your boat engine.
Step 3: Connect the Multimeter Wires
Just like the static test, connect the multimeter to the wires. The pattern you connect is Y1 and Y2, Y2 and Y3, and Y3 with Y1. this way you can get the readings.
The top left connection is the Y1. the connection right to that is the Y2. and the bottom connection is Y3.
Step 4: Calculate the Readings
This time around you need to put the multimeter in the volt setting. Cause you need to calculate the volt in a running engine. The resistance can be calculated when the engine is off. But the volt reading says how much power the engine is getting.
Now make sure the engine is in an idle state. The reading you are looking for must sit between 18 to 25 volts. You can see when you rev the engine the volt readings will increase. But your not looking for the reading.
If all the connections read out between 18 to 25 volts, that means the stator is all good. You don’t need to change or repair the stator.
Step 5: Connect the Stator Wires Back
After you are done calculating make sure to close the lid of the engine. It’s better not to do any tests while you are on bigger water bodies. Cause anything can go wrong and that might get you in trouble.
Give a complete check of your boat before you head out. Make sure everything is alright with the engine as well.
Also, if you are not feeling confident, there’s always an option to call the professionals. Depending on the engine, the symptoms of a bad stator can vary. A mercury bad stator symptoms will differ from johnson stator symptoms.
That was the whole process of testing the stator on the idle state.
FAQs
What are the Symptoms of Stator Failure?
If the engine fails to start and there is no spark, the stator is damaged. You might also notice the engine is hard to start after a long period. The engine can stall as well. Also, the engine will not charge the battery.
How to Test a 4 Wire Stator?
Testing a 4-wire stator is similar to testing a 3-wire stator. There are Y1, Y2, Y3, and Y4 wires. Go in a pattern like Y1 with Y2, Y2 with Y3, Y3 with Y4, and Y4 with Y1. this way you can test a 4-wire stator with a multimeter.
Can you Repair a Stator?
You can repair a stator. A stator consists of coils and magnets. Fixing the stator by yourself can be tough. That is why it is better to take it to the professionals. But in some scenarios, replacing the whole stator can be a good idea.
How many ohms should a stator have?
A good stator is expected to have between 0.2 to 0.5 ohms. This value depends on the model of the stator, so you want to check the specifications for your particular model. To check the resistance values, set the knob of the digital multimeter to the symbol .
Insert the multimeter probes into the sockets of the stator and you should read between 0.2 to 0.5 ohms. If you get a reading of infinity, that indicates a break in the stator windings and it will need to be replaced.
What voltage should a stator put out?
A good stator is expected to produce a reading above 60 VAC when revved up to 3000 RPM. This value differs based on the model of the stator, so you want to check the specifications for your particular model.
To check the voltage, set the knob of the digital multimeter to the symbol and insert the multimeter probes into the sockets of the stator. You should read between 60 and 70 volts. If you get a reading of zero volts, then the stator is defective and will need to be replaced.
Will a stator cause no spark?
Yes, a faulty stator can cause a lack of spark in a motorcycle engine. Common symptoms of a failing stator include a weak spark, engine not starting, and difficulty starting the engine. To test if this is the problem, you can use a digital multimeter to check the resistance of the stator coils. If the resistance is too high or too low, the stator may be faulty and need to be replaced.
Can a stator be fixed?
Yes, in many cases a stator can be fixed, either by repairing it or replacing it. Repairing a stator usually involves unwinding and cleaning the original stator core, then rewinding it with a machine or carefully by hand.
Replacing the stator is a simpler solution, as it can be done for $100 or less.
However, it is important to note that repairing stators can be an intricate and time consuming process, so it is advisable to seek the help of a professional if possible.
Endnote
Testing an outboard stator is a simple process that can be done using a multimeter.
By following the steps outlined above, you can ensure that your boat’s electrical system is working correctly and prevent any potential damage caused by a faulty stator.
Remember always to take the necessary safety precautions when working on any electrical component of your boat, including disconnecting the battery’s negative cable.
Good luck with your stator!
I’m Liam Jackson, the proud owner and driving force behind KayakPaddling.net. Born somewhere in the expansive beauty of the United States, I’ve nurtured a lifelong passion for kayaking and fishing that has led me to explore the far corners of our nation’s waterways.